
JENISE ONG
3D Modeling/Surfacing/Technical Artist
zExporter
zExporter v001.001
A High-poly & Low-poly Exporter Tool
fo Surfacing Subdivision Workflow Assets
Installing the Tool
extract the files < zExporter.zip > into your Maya scripts folder
↳ ex: Z:\Maya\2025\scripts

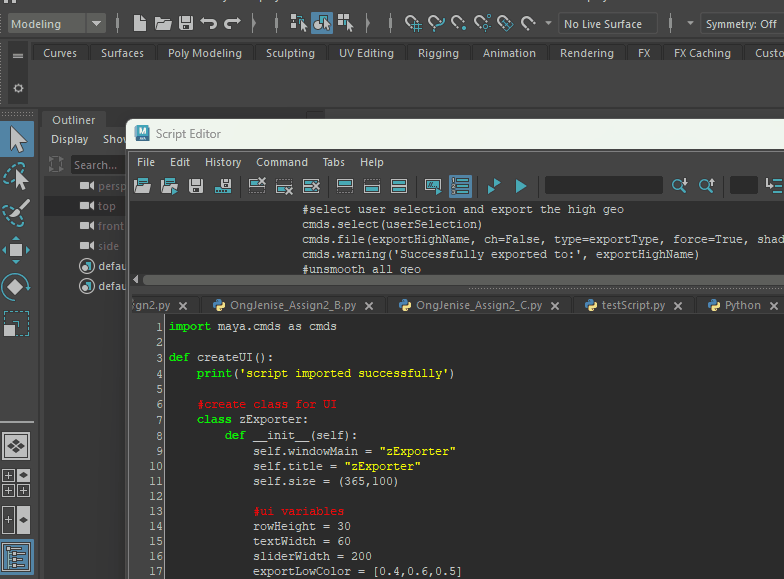
Open the Maya Script Editor, and from there, open the script
Within the Script Editor, select all the text (CTRL + A),
and click and drag into your shelf of choosing.
When it asks what type to save it as, choose Python.
Right click on the shelf icon.
In the Shelf Editor window, click on the Shelves tab.
Under <Icon Name>, click on the folder icon.
Navigate to where you extracted the script, and select the icon png (\zExporter\icons\zExportIcon.png)
Great! now you’re ready to use the script ^^

Before you Start
-
Make sure all geometry have unique names.
-
Be careful when using this tool on extremely dense meshes! Too much density may cause Maya to crash.
-
Save before using the tool. Subdividing geo may result in Maya using too much memory, and may crash your scene
Workflow Steps

Step 1
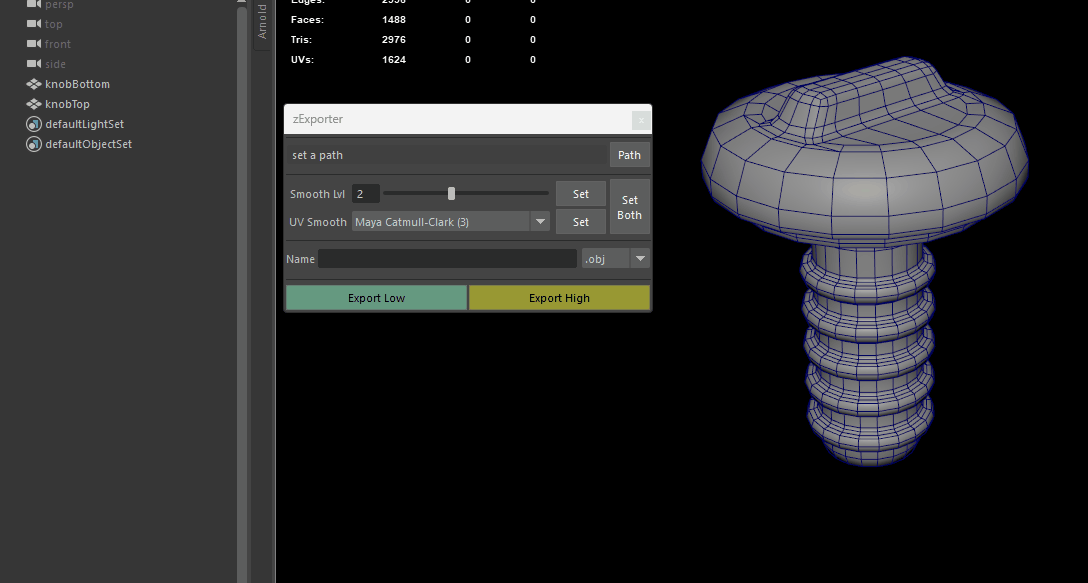
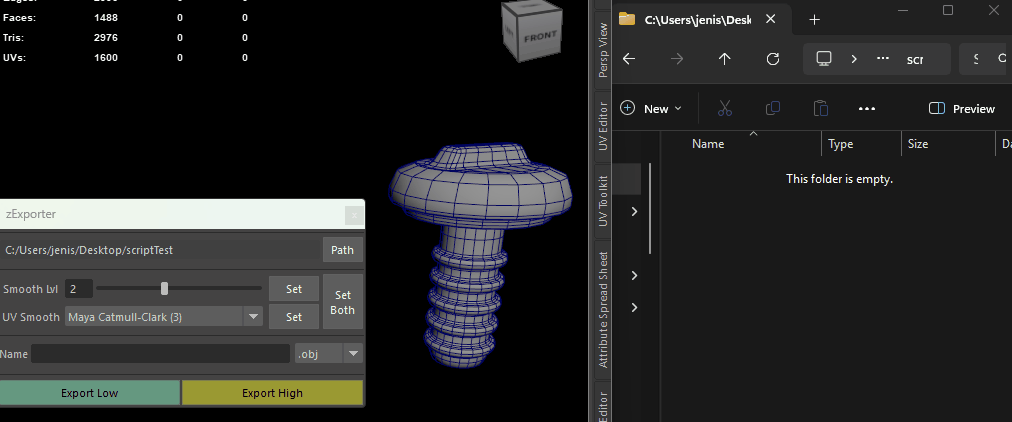
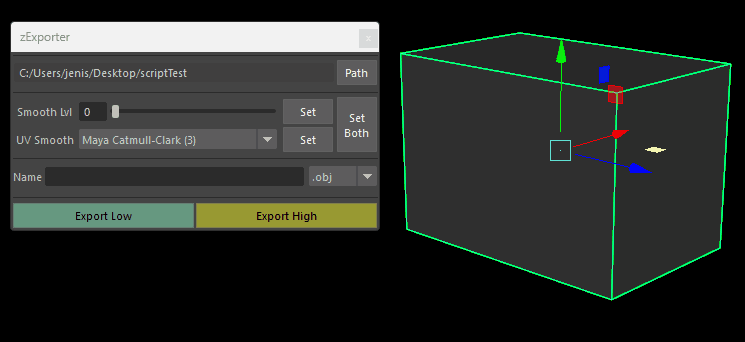
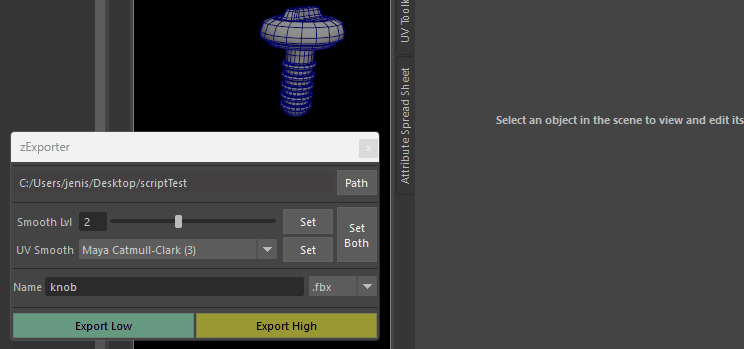
Set a path. This will be where the script exports your geo.
Step 2
Set the level of smoothing for the selected geometry.
Set the UV Boundary Smoothing option for the selected geometry.
Note: if exporting when none are set, the script will apply Maya default values
Smooth Lvl = 2 UV Smooth = Maya Catmull-Clark (3)
Step 3
Set a name for the export.
Set the desired file type for the export ( obj / fbx / ma )
Note: the script automatically adds a suffix of ‘_high’ to the high export
Step 4
Export your geo to the specified path.
Sample Asset
Check that each piece of geometry has a unique name.
Click on the <Path> button to set a path for the exports.
Select the geometry we want to export.
Adjust <Smooth Lvl> by using the slider, or by typing a value. When done, click on the <Set> button.
Adjust <UV Smooth> by selecting one from the drop down menu.
When done, click on the <Set> button.
You can also set both at the same time by clicking on the <Set Both> button
Enter the filename we want the export to have.
Select the desired export file type.
Select the geometry to export.
Click on <Export Low> to export the low poly mesh.
Click on <Export High> to export the high poly mesh.


High poly export
Low poly export

Now when surfacing in Substance Painter and selecting the high poly export < knob_high.fbx >, match by name will work as expected!
Tool Tips
You can preview how the smoothing level will look by using Smooth Mesh Preview (tap 3)

You can check what each piece of geometry is tagged with by checking the Attribute Editor
If you export without setting either <Smooth Lvl> or <UV Smooth>, it will apply the Maya default values, and export the high poly with those settings applied.
© 2026 by Jenise Ong. Made with Wix.com